Introduction
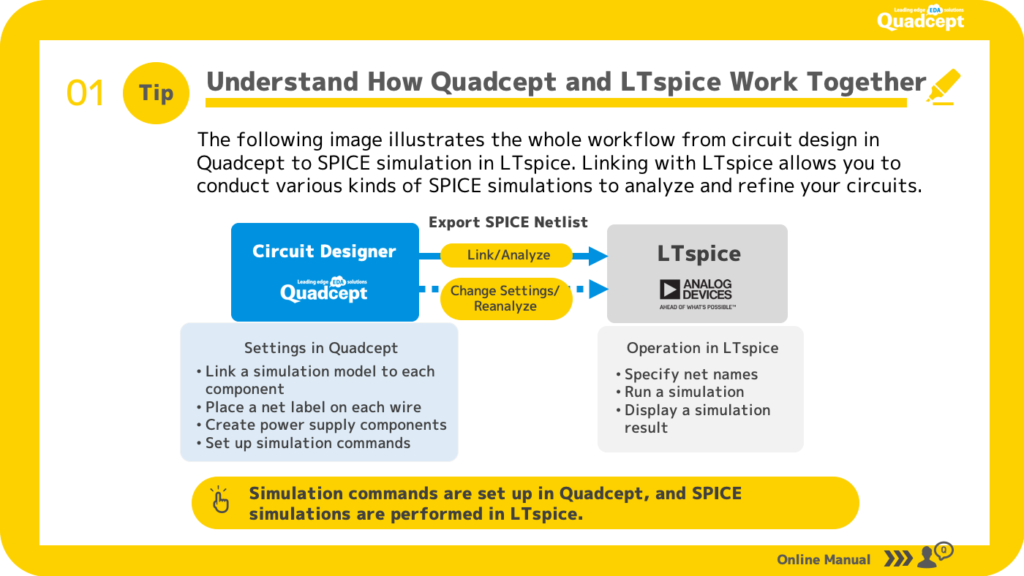
First, let’s understand the Quadcept to LTspice collaboration flow.
Create a schematic in Quadcept. Generally, it is not realistic to verify the entire circuit, but rather a part of the required circuit. In order to run the simulation, you will also need to add probes to specify the power supply for the simulation, which is not originally needed in the schematic, and the wiring to be simulated. Therefore, copy the circuit block you want to simulate, paste it on a separate sheet, set the simulation conditions, and run the analysis.
The information required for the linkage is the “spice netlist” and “simulation parameters” for data transfer from Quadcept to LTspice, and LTspice will start automatically after the execution from Quadcept. We will briefly introduce each of these tasks and preparations so you can understand the overall flow.
Five preparatory tasks in Quadcept
- Register the spice model to the part data
- Place “labels” on the wires you want to simulate
- Place power supply components for simulation
- Set simulation conditions (parameters)
- Link with LTspice by specifying and executing simulation type
Register the LTspice model to the part when it is created or after it is placed.
The LTspice tab will appear on the Quadcept part attributes screen, and a list of registered models will be displayed, so it is necessary to register the model to be used. If the spice model is not available as standard, you need to obtain the spice model in advance and store it in the folder specified in LTspice.
Two tasks on LTspice side
- After startup, select the “label (net name)” you want to simulate
- Waveform results are displayed.
This is a rough flow, but did it give you an idea?
Next, we will introduce the types of SPICE models and the folders in which they are stored.