Getting started with a brand new tool is always a tough sell. When you start using Quadcept, you may not be able to do what you want, or you may do unintended operations, because you don’t know where the menus are.
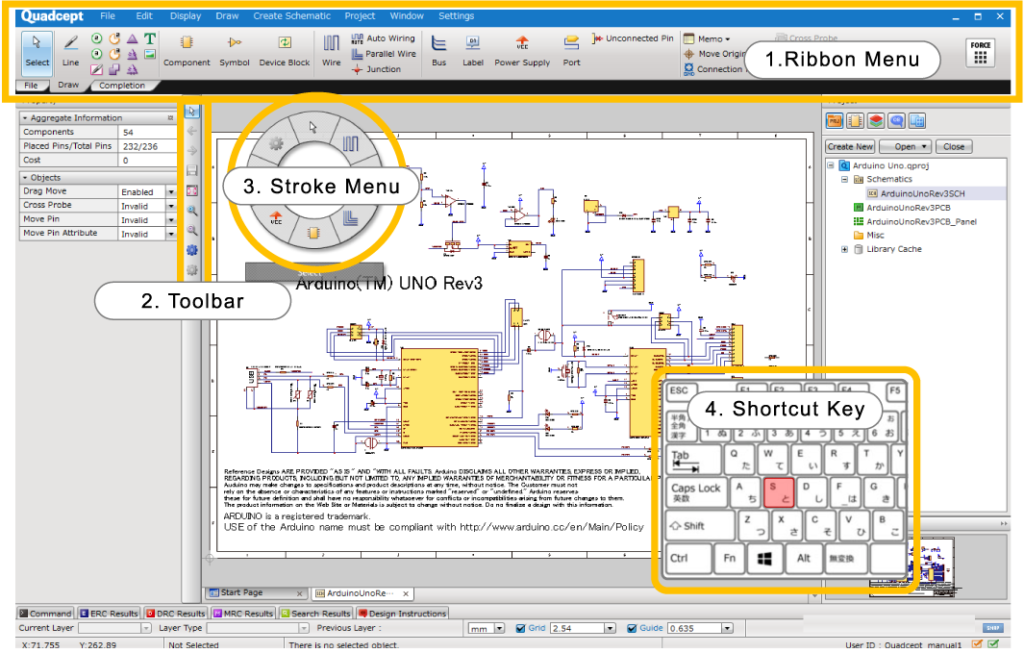
In Quadcept, the ribbon menus, toolbars, stroke menus and shortcut key table are freely customizable. This topic explains how you can customize those resources in an editor for better efficiency.
Customizable 4 Menus
To open the Customize Menu dialog, go to the Settings menu and then click the Customize Menu command.
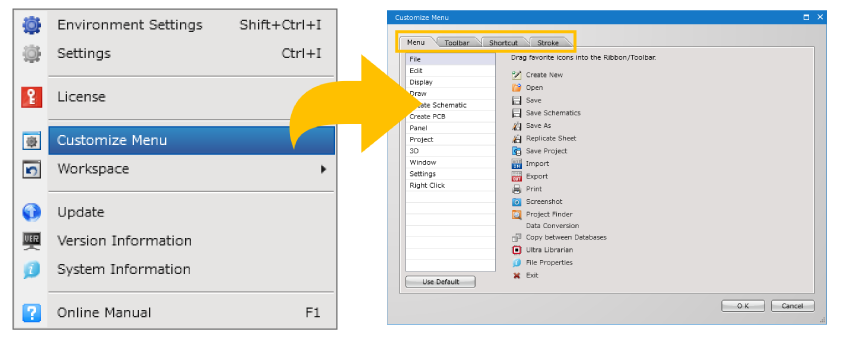
You can customize each resource in this dialog.
Ribbon Menu
Customizing Ribbon Menus
Arranging the menus in the order of schematic / PCB design workflows allows you to understand the entire design process and do designs more efficiently. If you are managing a team, this also helps to standardize the design workflow within your team.
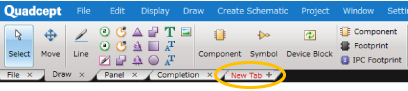
When you open the Customize Menu dialog, a new tab will appear on the ribbon menu. Clicking the tab and typing its ribbon name will generate an empty ribbon.
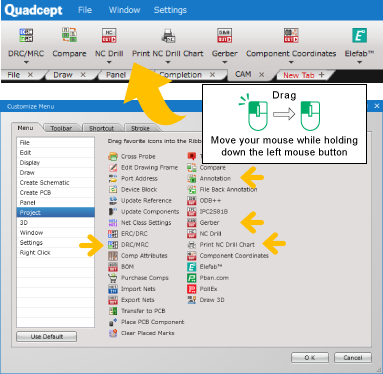
After creating a new ribbon tab, put commands you need onto that tab. Arranging the commands in the order of the design process allows designers to go through the necessary processes from the final data verification to manufacturing document export without hesitation.
Verification / Export Commands
| DRC/MRC | Used to check the integrity of your design from the logical and physical perspective. |
| Compare | Used to compare differences between your current and past designs. |
| NC Drill | Used to generate NC drill files for manufacturing drill holes. |
| Print NC Drill Chart | Used to print a NC drill chart. |
| Gerber | Used to export Gerber files that are necessary for board manufacturing. |
| Component Coordinates | Used to generate pick and place files for component assembly. |
| Elefab™️ | Used to connect to the online one-stop service from PCB design all the way to PCB assembly, Elefab™. |
The commands for PCB layout can be added to the ribbon menu from within a schematic design document, but they will not be displayed while designing a circuit, and will be shown when you open a PCB design sheet. Please note that the commands such as Gerber and NC Drill added through this instruction will not be displayed while you open a schematic design sheet.
Toolbar
Customizing Toolbars
The toolbar can be moved and placed anywhere you want during design. It is docked at the bottom left corner of the screen by default. It can be added or deleted freely just like ribbon tabs. The instructions that follow explain how you can add a toolbar for drawing commands as an example.
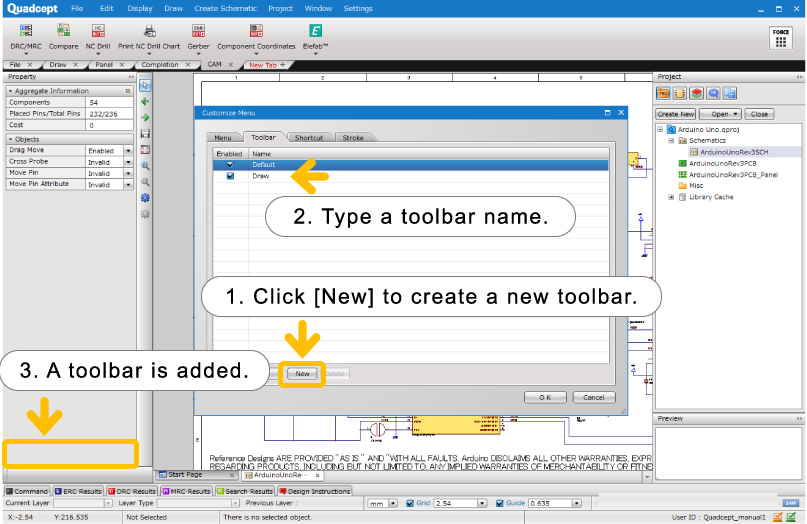
- After opening the Customize Menu dialog, select the Toolbar tab and then click the New button at the bottom of the screen.
- Type a toolbar name. It is named Draw in the image above.
- The new toolbar will be generated at the bottom left corner of the screen.
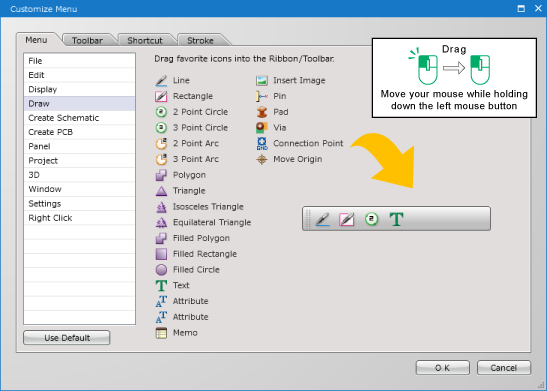
- Go back to the Menu tab, and drag a drawing command and drop it onto the toolbar.
Shortcut Keys
Customizing a Shortcut Key Table
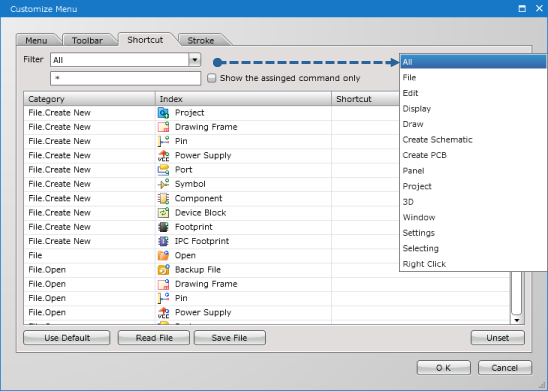
The shortcut key table can be customized in the Shortcut tab of the Customize Menu dialog. Opening this tab will show the list of all the features in Quadcept. Selecting a command and pressing a key on the keyboard will allow you to assign that key as the shortcut for the command. It is easy to find your desired commands by using a filter.
This table can be exported as a XML file by clicking the Save File button. If you want to share your setting with other designers, export the XML file and then share it with them. The XML file can be imported by selecting the Read File button.
Creating the shortcut key table you are familiar with helps you focus on your design and work more efficiently.
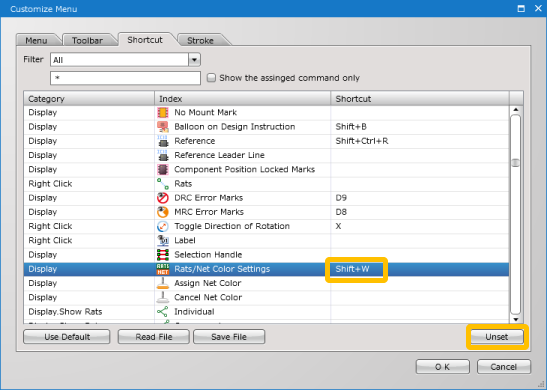
Let’s assign a shortcut key for the Rats/Net Color Settings command. Find the command from the command list and click on it. After you select it, press the Shift and W keys in the keyboard. The combination of those keys will be registered to the Shortcut field for the command. Click the OK button to save the table.
When you want to remove the shortcuts you have assigned, select the Unset button located at the bottom right corner of the dialog. Please note that the shortcuts will not be removed when you press the Delete or BackSpace keys, because they can also be registered as shortcut keys.
Select a command from the command list, and press any key(s) to be assigned as a shortcut in the keyboard.
Select a command from the command list, and click the Unset button located at the button right corner of the dialog.
Stroke Menu
Customizing Stroke Menus
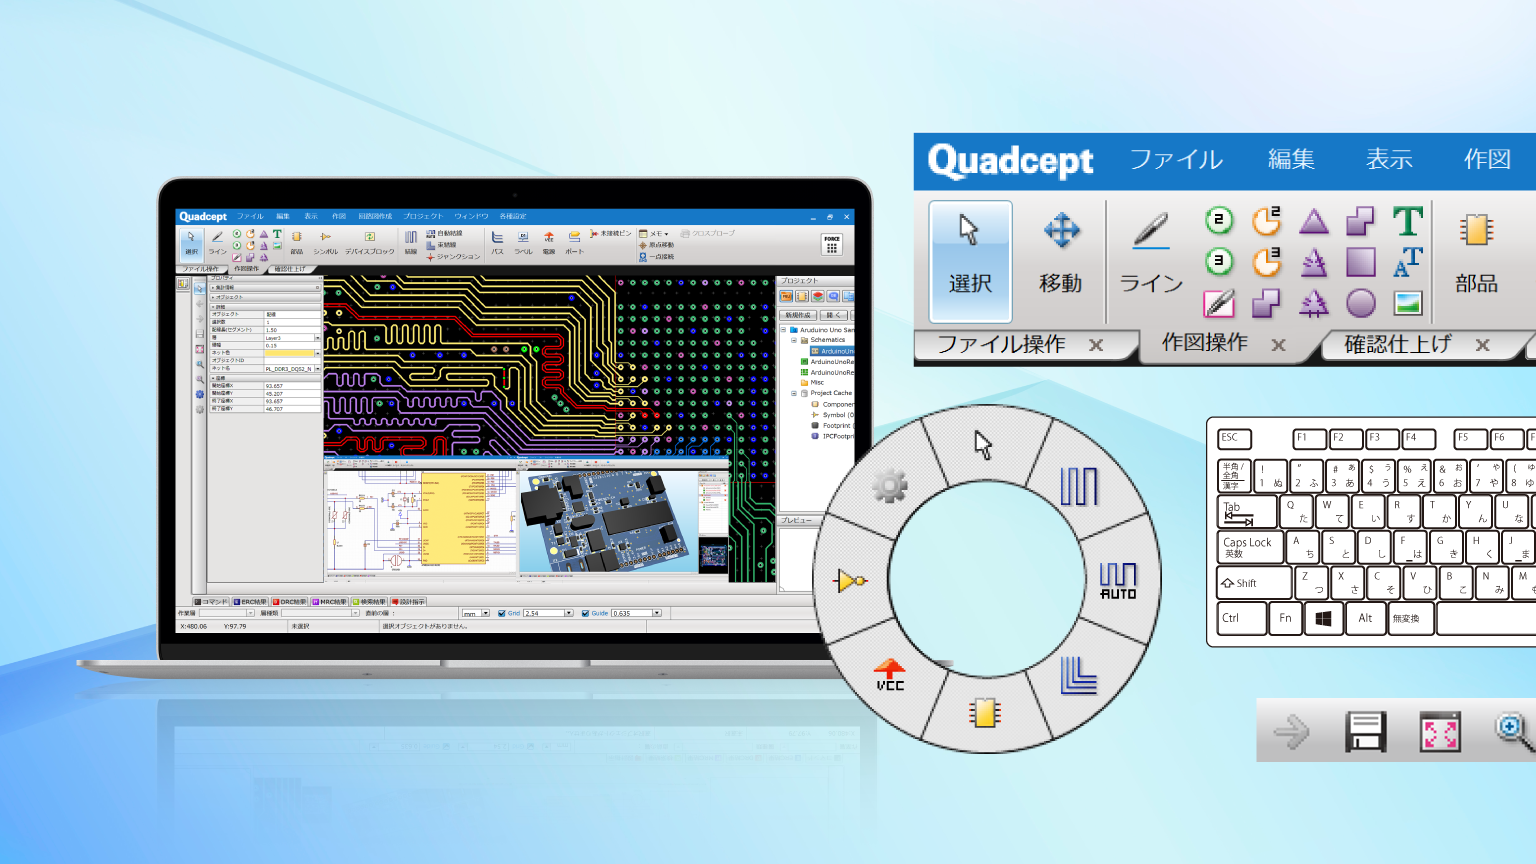
The stroke menu is a circle-shaped shortcut menu that appears when you press the mouse scroll button.
This is useful because you can select menus without having to move the mouse a long way to reach each menu position. The stroke menu can be defined for each design document, and you can register a lot of shortcuts by using the Ctrl, Shift and Alt keys in the keyboard together.
Now, let’s define the stroke menu.
Open the Customize Menu dialog, and select the Stroke tab. At the left side of the dialog, select a design document type that you want to define the stroke menu for. After specifying the document type find a command you want to add in the command list located at the right side, and drag and drop it onto the stroke menu at the center. After you have added the command(s) you need, click the OK button to save the settings.
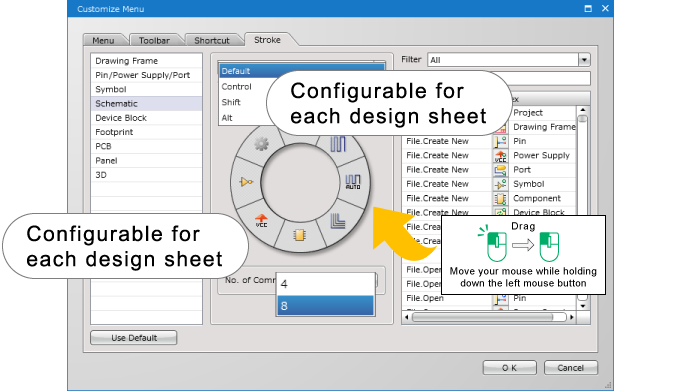
While you hold down the mouse scroll button, pressing the Ctrl, Shift or Alt key allows you to switch the stroke menus. The stroke menu shown when pressing each key can be defined by selecting the key type in the pull-down menu at the top of the dialog.
In addition, the number of registrable commands can be specified at the No. of Commands field. Up to 32 commands can be assigned by setting that number to 8.